News Blog /

Scale Your Power BI Embedded Capacity in the Azure Portal

by Amy Walsh - Oct 26, 2023
Scale Your Power BI Embedded Capacity in the Azure Portal

Microsoft’s Power BI Embedded, a service within the Azure ecosystem, offers a powerful toolkit for Independent Software Vendors (ISVs) and developers. With it, you can seamlessly integrate visuals, reports, and dashboards into your applications. As a Platform as a Service (PaaS) analytics solution, Power BI Embedded leverages Azure-based resources, billing customers on an hourly basis without requiring an annual commitment.

In today’s data-driven world, the ability to efficiently manage your Power BI Embedded capacity is paramount. Microsoft Azure offers a solution that allows you to scale your capacity up or down, depending on your needs.

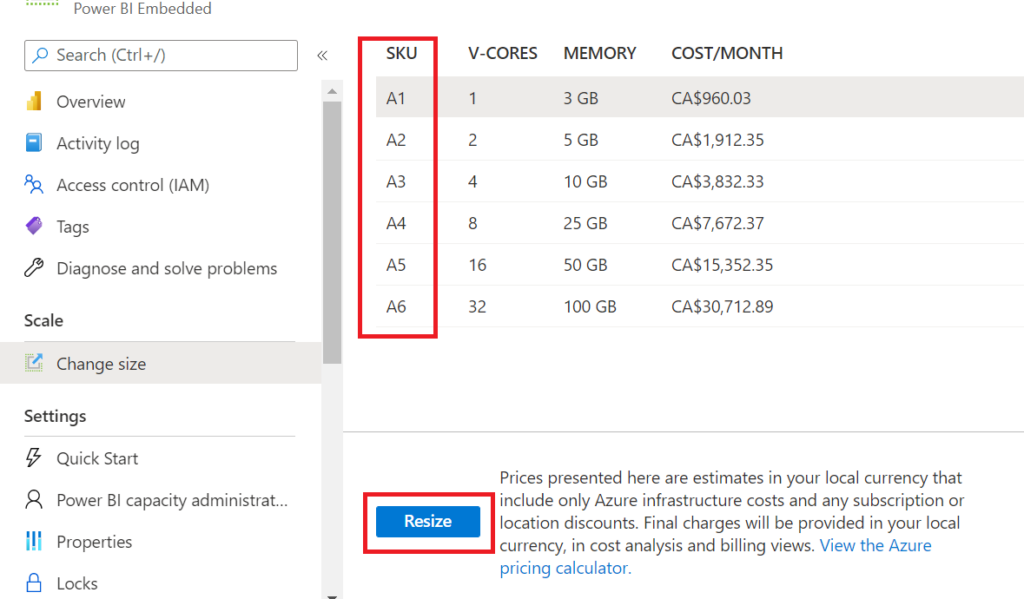
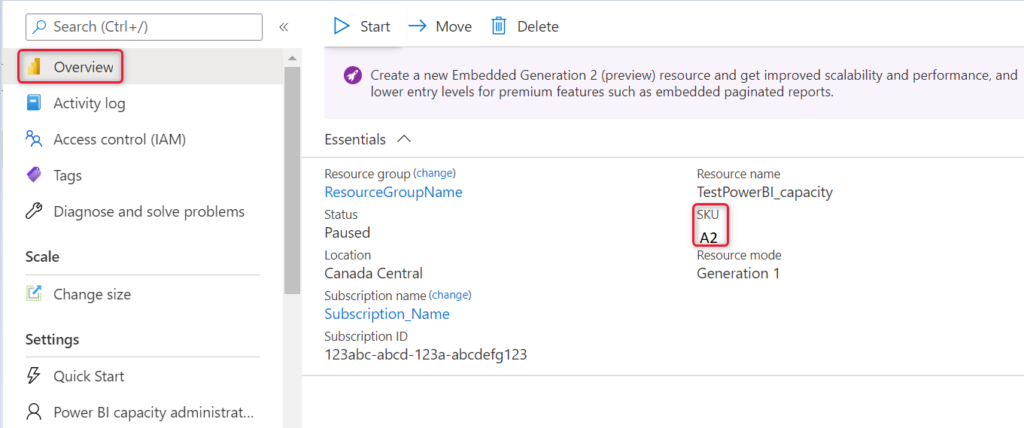
This article provides a step-by-step guide on how to scale your Power BI Embedded capacity, empowering you to optimise your resources effectively with the assistance of Spanish Point.

Before You Begin

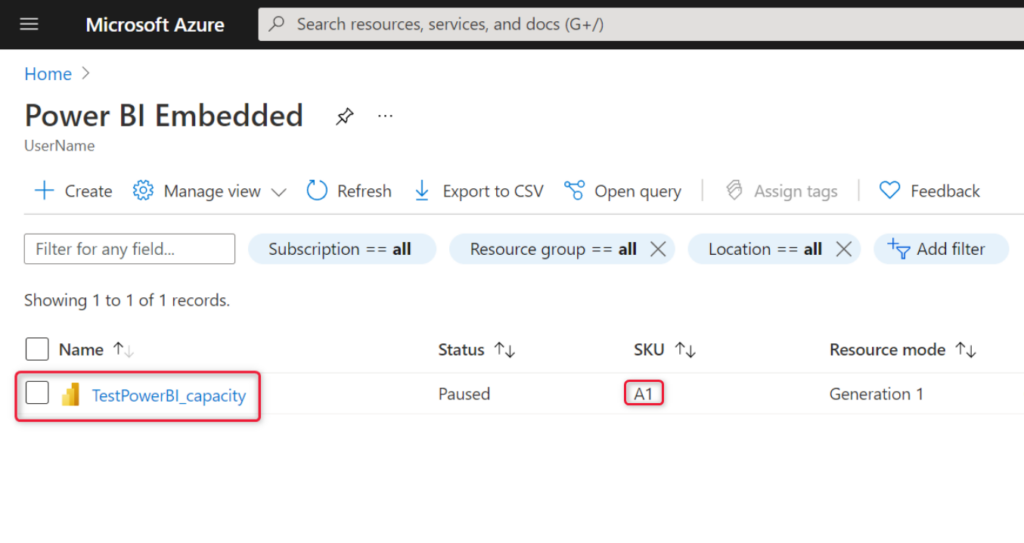
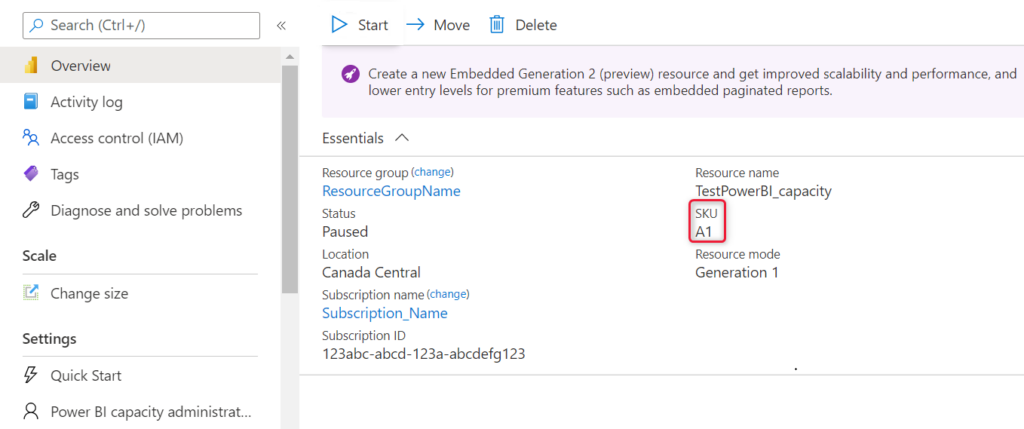
Before diving into the scaling process, you should have already created a Power BI Embedded capacity, specifically an A SKU. If you haven’t done so, refer to our guide on “Create Power BI Embedded Capacity in the Azure Portal” to get started.

Note: This article focuses on vertically scaling A SKUs and does not cover horizontal scaling or P SKUs.

Scaling Your Capacity

  • 1. Sign in to the Azure Portal:
    To initiate the scaling process, sign in to the Azure portal using your credentials.
  • 2. Access Power BI Embedded Services:
    Within the Azure portal, navigate to “Azure services,” and select “Power BI Embedded” to view the list of your capacities.
1 1
  • 3. Select Your Capacity:
    Choose the specific capacity you wish to scale. The current scale for each capacity is displayed under the SKU category.
2
  • 4. Retrieve Information:
    When you make your selection, details about that capacity will be presented. This includes information regarding the current scaling under SKU.
Azure Portal Capacity Details
  • 5. Initiate Scaling:
    Under the “Scale” section, click on “Change size.”
Azure Portal Change Size
  • 6. Select Your New Scale:
    Choose a new scale that aligns with your requirements and click “Resize.”
Azure Portal Scale Pricing Info
  • 7. Confirm Your Tier:
    Verify your new tier by referring to the overview tab, where the current pricing tier is listed.
Azure Portal Confirm Tier

Autoscale Your Capacity

For those looking to dynamically resize their capacity based on memory and CPU requirements, Azure offers autoscaling options. Here’s how you can leverage autoscaling techniques:

  • Power BI Embedded Azure Resource Manager REST APIs: Utilize REST APIs like “Capacities – Update.” To understand how to use this API, refer to the provided runbook PowerShell script capacity scale-up sample.
  • Azure Alerts: Employ Azure alerts to monitor Power BI capacity metrics such as overload and CPU utilization. When these metrics reach specified values, Azure Monitor Alert rules can trigger an upscale or downscale runbook script. For instance, you can create a rule to upscale the capacity if CPU surpasses 95% or if there is an overload. Conversely, you can create a rule to downscale if CPU drops below 50%. You can use the Power BI Embedded sample script as a reference for scaling your capacity effectively.

Power Bi June updates

Get in touch with our experts at Spanish Point to help you optimise your Power BI:


In conclusion, mastering the art of scaling your Power BI Embedded capacity in the Azure portal empowers your business to optimise resources and efficiently manage your data-driven solutions. Whether you choose manual scaling or opt for autoscaling, Azure provides the flexibility to meet your evolving needs. Stay agile and responsive to your business requirements with Azure’s powerful scaling capabilities, supported by Spanish Point.